Access Users from the sidenav or by appending /users to your KeepnTrack URL.
Table of Contents
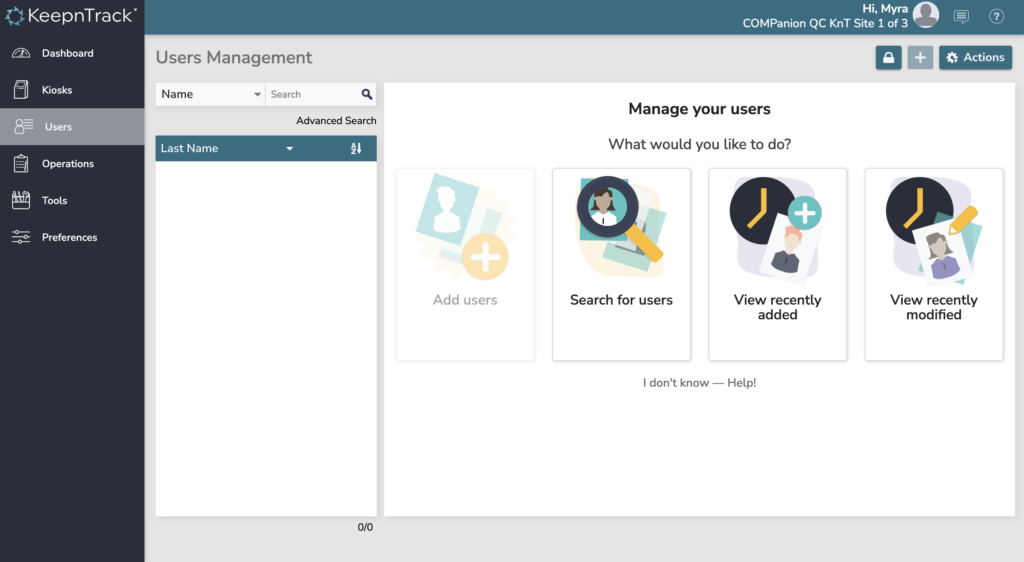
When you first come to Users Management, you might not see any user records. Use one of the cards or perform a search to pull up relevant user records.
Can I just see my records? Perform a blank search (i.e. click into the search box and press <enter>) in order to load user records immediately into the interface.
Manage Users
Your list of user records shows on the left, in the record list pane. You can sort and search for users here. Select a record to see its details on the right.
Above the record area is the header, which contains the lock, add, and actions menu.
Add a User
Use the plus (+) icon at the top to add a new user. Name and barcode are required, although if you leave barcode empty it will default to the next barcode from your preferences.
Remove user
From the actions menu, choose remove user to permanently remove a user from the system.
Searching
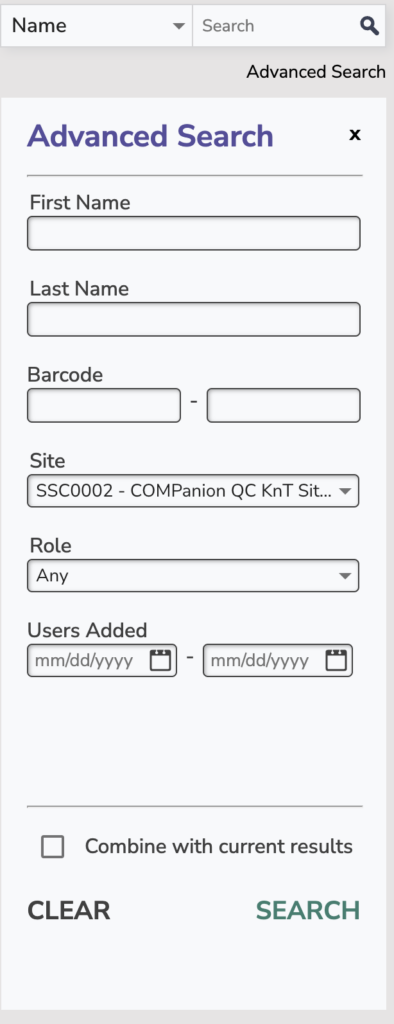
Perform a basic search by Name, Barcode, or Homeroom. By default, the basic search will search the site you are logged in to. In order to search other sites, you’ll need to open Advanced Search.
Advanced Search lets you narrow down your search by looking for users by first name, last name, barcode, site, role, and the date they were added.
Basic info
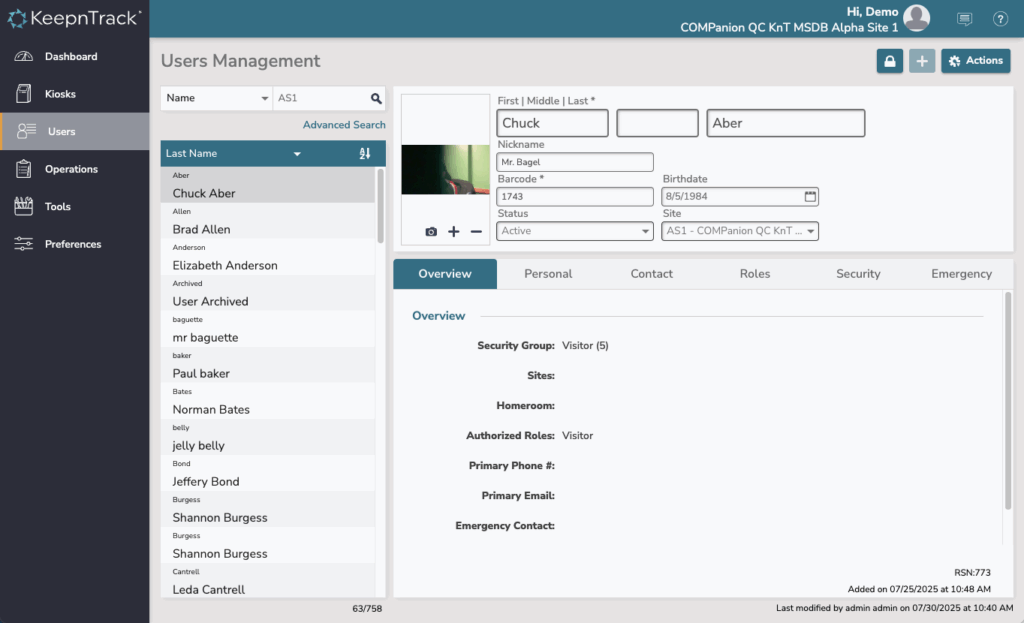
The top portion of the user record is the basic important information for that user, which remains in place no matter which tab you are looking at.
Name — First | Middle | Last. Last name is required to save. You also have an optional Nickname field for alternate names.
Barcode. Required. If you leave the barcode blank, it will default from your next barcode preference. Barcodes are numbers used to identify this person, and can be used to sign in to kiosks.
Birthdate. We highly recommend having birthdates for your users, and requiring them to enter their birthdate when signing in to kiosks.
Status. Most people are Active, but you can set other statuses here. These statuses can be selected in some reports/utilities.
Site. The home site of this user. Mostly useful for reporting; it also controls who can view/edit their user information. (I.e. Only operators with access to a user’s site can edit their information.)
Picture. You can add or take a picture to help identify this person when they sign into the kiosk.
Terminology A lot of User data field names depends on the terminology you have set in Preferences. We’ve noted this with [Terminology] where it applies.
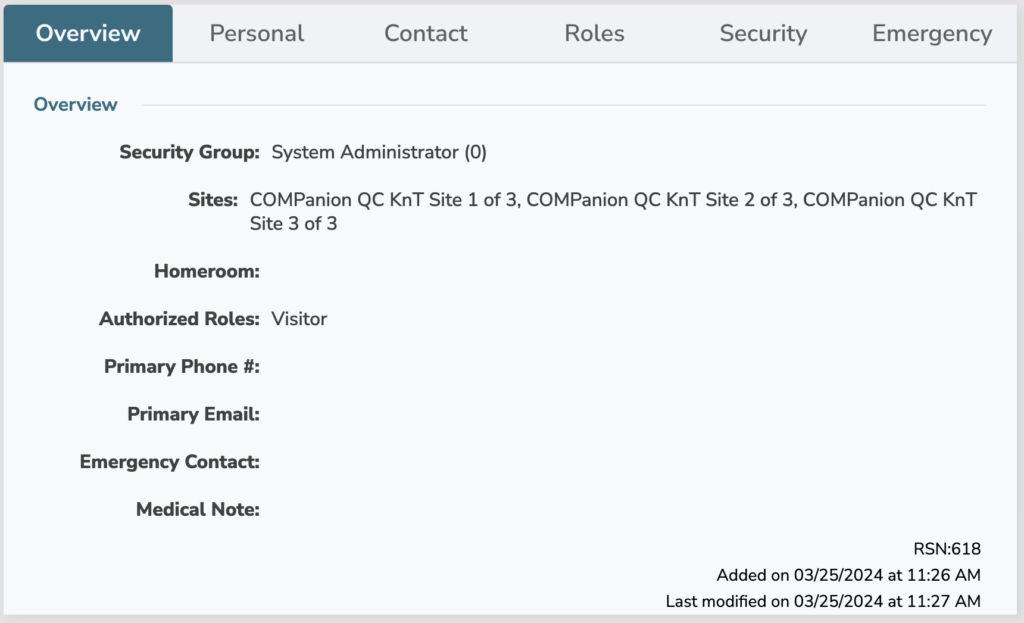
Overview tab
This is a handy read-only overview of the user’s data. Click the data name to jump to that field in a different tab to see more or to edit the information.
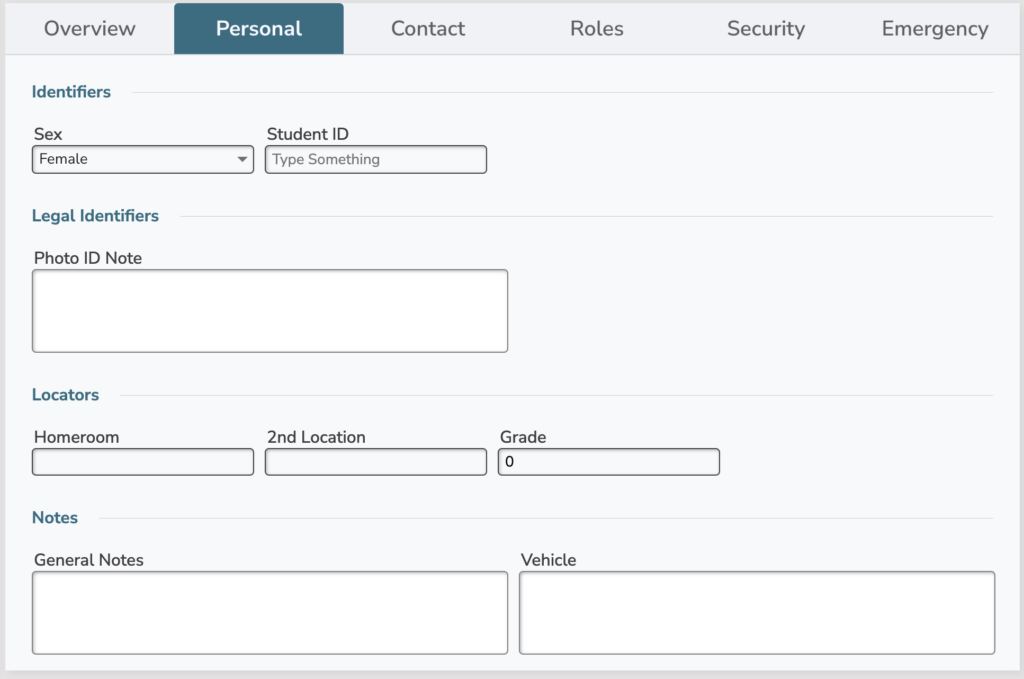
Personal tab
Enter personal information for this user. Most of this is for your records only; some data may show in certain reports.
Sex. Female, Male, or Unspecified; this is not a gender statement, but the legal sex that appears on ID, to help operators make determination during security checks. However, you can always set it to Unspecified if you don’t use it.
Student ID. [Terminology; Community ID]. Alternate ID that can be used to sign in to kiosks.
Photo ID Note. If you need to keep track of driver’s license number/state or other ID numbers, you can use this note field. You can also use it to specify what type of ID this person used when signing up to volunteer at your site.
Homeroom. [Terminology; Location]. Usually for homeroom or teacher name, so you can find this student. It could also be used for department (for staff) or volunteer locations.
2nd Location. [Terminology].
Grade. [Terminology; Level]. Usually for a grade so that you can run reports on specific grades (if you are tracking students with KeepnTrack). Otherwise, leave it blank, or use it for something like specific volunteer types.
General Notes. What’s missing? Keep any other notes for this person here. These notes are only visible here.
Vehicle. [Terminology; Vehicle Information]. Use this to track this user’s vehicle make/model, license plate, parking information, bus #, or anything else you need.
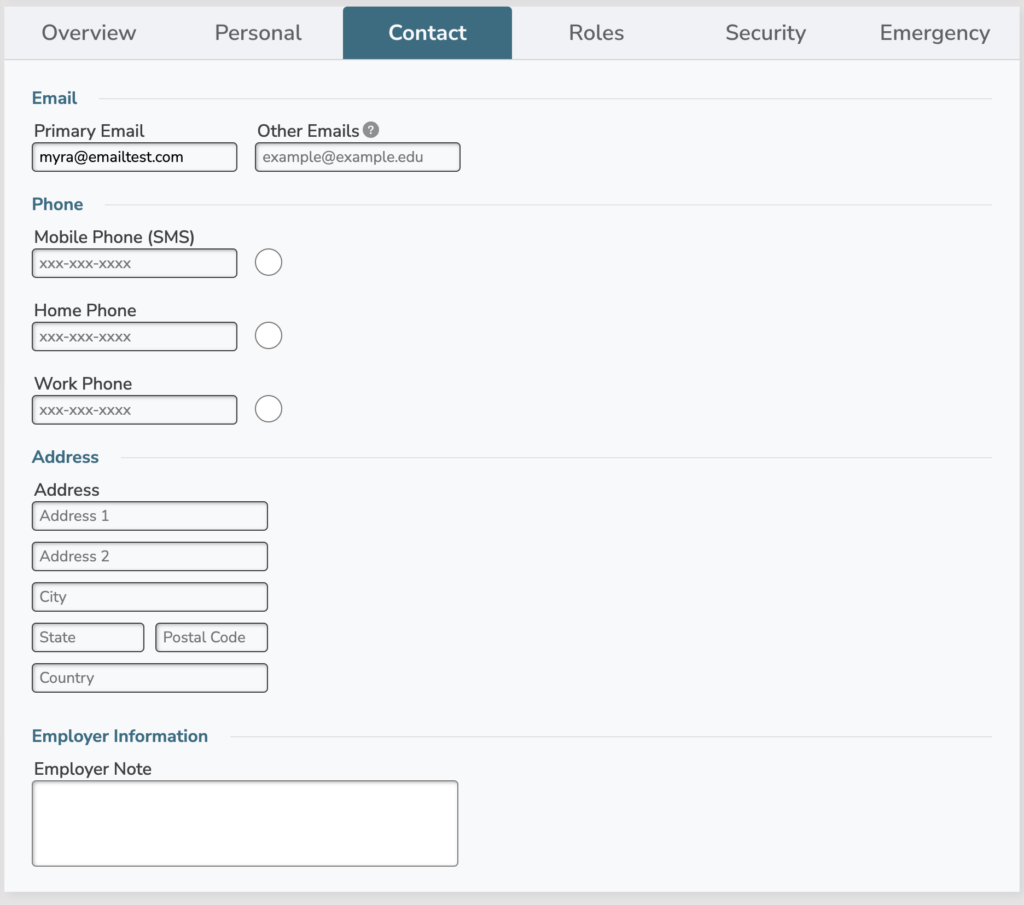
Contact tab
How you can get ahold of this person.
Primary Email. The main way to email this person. This field may also be used for SIS matching.
Other Emails. Additional emails, such as personal/work emails or parent emails. Enter multiple emails separated by commas.
Phone. Choose the preferred method of contact: Mobile Phone (SMS), Home Phone, Work Phone [Terminology; Other Phone].
Address. For your records.
Employer Note. Usually for volunteers, so you can mark their regular employer and sometimes their employer’s contact information.
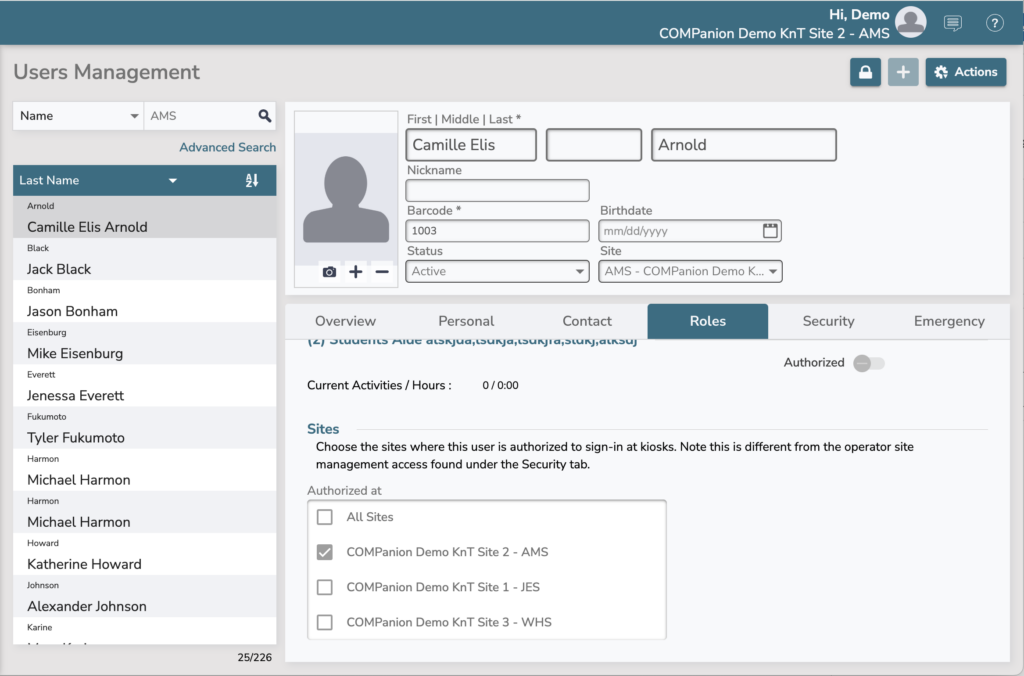
Roles tab
Choose what roles this user has in your system. All users are Visitors (0); once authorized as another role, they may be referred to as ‘visitors’ but will be counted as that other role and not ‘visitor’ when it comes to reports, utilities, kiosks, and more.
Forms
Any forms this user has submitted (as long as they haven’t been removed) show up here. You can view the entire form, including any custom questions.
(1) Volunteer
[Terminology]
Authorize this user as a Volunteer to let them sign in as Volunteer in kiosks.
Start Date / Expiration Date. Usually for volunteers only, this field lets you limit volunteer access to a certain time frame. For example, if your institution requires volunteers to reapply every year, you may set the Expiration Date to 1 year after the volunteer first applied. Users can not sign in to kiosks if the start date is in the future or the expiration date is in the past.
Current Activities / Hours. The number of activities (unique sign-ins) and hours this volunteer has in the current period. The current period can be set via a utility; otherwise, it’s simply lifetime.
(2) Role 2
[Terminology]
Similar to Role 1 Volunteer, but without the specific volunteer data.
Sites
A list of sites where you can select which sites where the user is authorized to sign in.
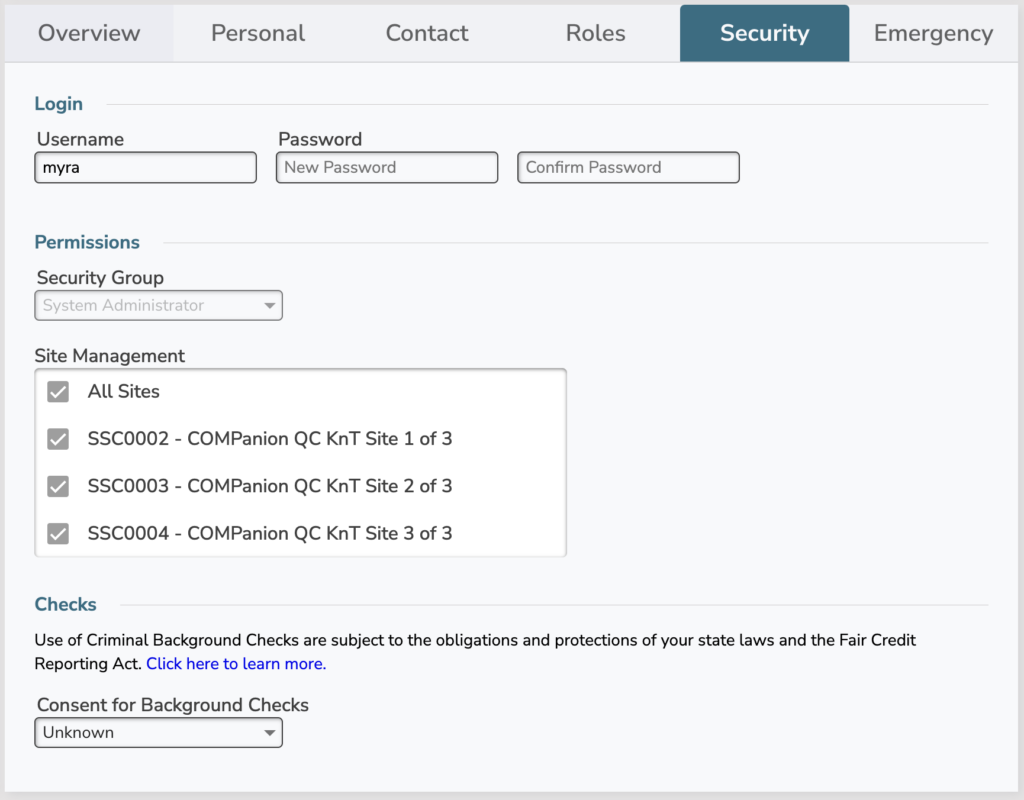
Security tab
This tab has two subtabs: Access, which we’ll talk about here, and Checks, which you can read about on Security Checks.
Username. Most users in your system are simply visitors and do not need access to log in to KeepnTrack. For your operators, however, you’ll need to give them a username and password so they can log in. Typically this is a variant of their name (e.g. first initial last name), or their barcode.
Password. Typically operators will set their own passwords. You can give them a starting password, and they can change it after logging in—or, the first time the operator tries to sign in, they can reset their password (if you’ve entered their email).
Note that KeepnTrack does not store the actual passwords, so when you save a New/Confirm password here, it will save an encoded version, and you will not see the password in this interface.
Security Group. This determines the access this user has to KeepnTrack. Most people are Visitors, but if you are creating an operator who needs to be able to change data in KeepnTrack, be sure to give them the appropriate security group. See Security.
Site Management. Choose which sites this operator has access to. This is for operators to log in to kiosks or administration modules. System Administrators have access to all sites and that can not be changed.
Emergency tab
Important information that you might need in case of an emergency with this person.
Public Medical Note. Note any medical conditions here. (At this time, there is no ‘Private’ medical note field. This information is visible to anybody with access to Users Management.)
Emergency Contact. Enter the name, phone, and email of their emergency contact. You can also enter a note for additional contacts or anything else you want to keep track of.