Form Builder

Set up the Form for your site.
Access Form Builder from Tools or by appending /formbuilder to your KeepnTrack URL.
Forms are an optional KeepnTrack add-on. Contact our Sales Team if you’re interested in adding them to your account!
Table of Contents
In Form Builder, you’ll set up how you want your form to look and what fields are required for anyone filling out the form.
Your form is specific to your site, so you can customize it with what you need. Any user filling out your form is added to your site.

Basic Info
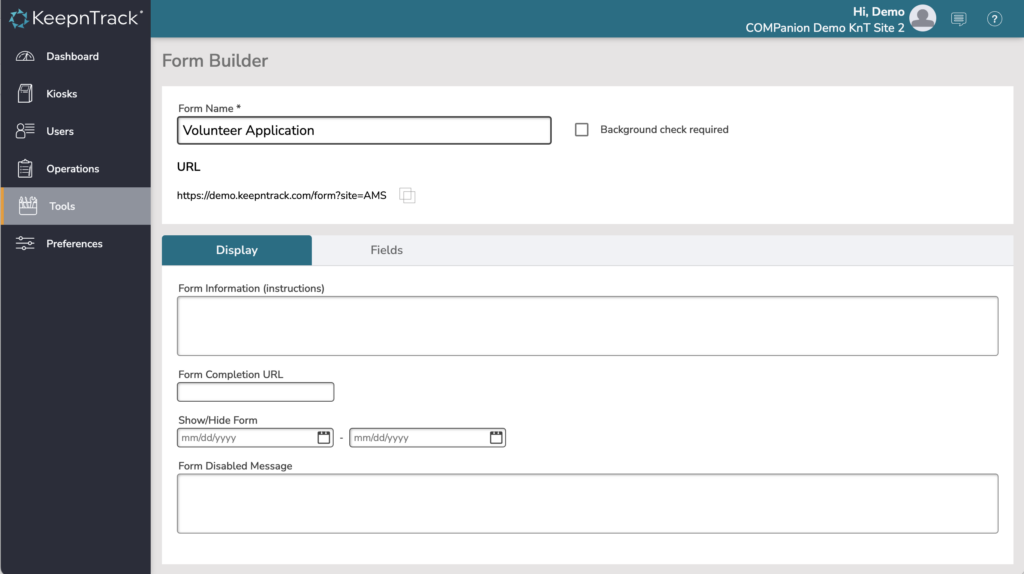
- Form Name. The name communicates the purpose of the form to operators and users alike. The form name shows with the form.
- Background check required. If your institution requires background checks for people filling out these forms—i.e. for volunteer applications—you can check this box. Checks can be run with Keepntrack (see Security Checks), or via separate services and the operator will set the Determination manually. Turning ON this option means that a form can not be Approved until the Determination has been set.
- URL. Copy the unique URL for this form to put the link on your website or send to relevant users. NOTE: If all of your forms are the same and for the same purpose, you may want to link to your KeepnTrack URL /form (e.g. demo.keepntrack.com/form) instead of to any specific form, and the user will choose their own site.
Display
Set up how and when this form is shown.

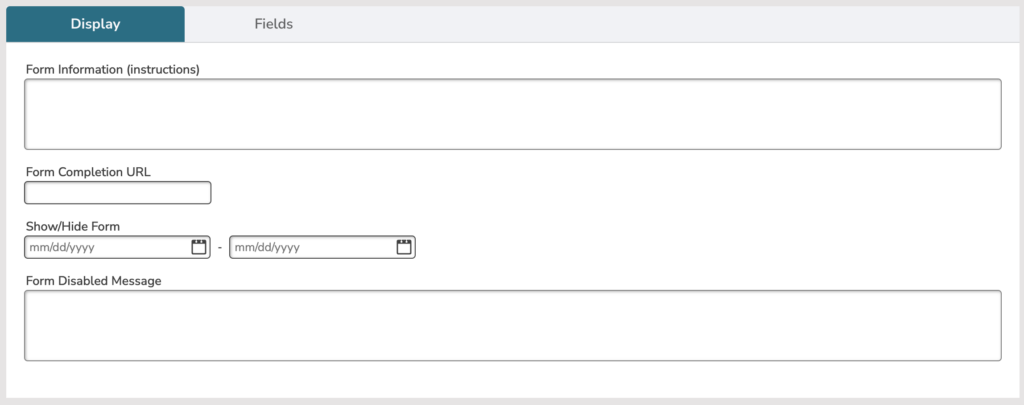
- Form Information, e.g. instructions. Display a message to anyone filling out this form. You might include special instructions for certain questions, contact information, or links to other resources. Markdown and HTML are supported.
- how to add links: Basic Syntax | Markdown Guide
- [My Link Here](https://www.google.com) → My Link Here
- [](https://www.google.com) → https://www.google.com
- []() → []()
- how to add links: Basic Syntax | Markdown Guide
- Form Completion URL. When a user submits the form, they are redirected to this URL. By default it is your KeepnTrack Hub, but we recommend a page that gives them more information. Note that you can customize the message that shows to the user after they submit a form—this is separate from that.
- Show/Hide Form. If you only accept submissions for this form at certain times, enter one or both of those dates here. Outside of those dates, the Disabled Message displays instead.
- Form Disabled Message. When your form is hidden, this message shows instead, letting users understand why they can’t fill out the form at this time. If you use a different form service, you might link to that here.
Fields
Choose which fields to include, and which are required.

Include:
- Background Check Consent. If you intend to run checks on the users who submit this form, you will need to get their consent. Only turn this option OFF if you are not running background checks. A Yes or No answer is required when this is included.
- Username/Password. Require a username on your form so that the user can create an account. Use this option if the user will be submitting more forms in the future, or if they will want to eventually see their personal information or kiosk sign-in history, e.g. volunteer hours. Note that the user won’t fill out a password on the form itself, as that is not secure—instead, they can go to a login page, and use the option to reset their password.
- Felony Conviction. Often, volunteer applications ask ‘have you been convicted of a felony’. If this is not a volunteer application-type of form, you probably don’t need this question.
- Include custom fields. These are optional, customized questions to include on your form. Set up your Custom Form Fields in Preferences.
- Allow to submit to multiple sites. Allow volunteers to apply to multiple sites at once.
Require:
- Birthdate. Require birthdates if you are going to run checks, and for more secure kiosk sign-in.
- Photo ID Note. i.e. driver’s license number.
- Address.
- Contact. Choose to require either email, phone, or both.
Once your form is set up, users can fill it out by going to that unique URL. This is called Form Apply. After that, you or other operators can review and accept or reject form submissions in Form Processing.

